Friday, November 15, 2024

DIY Bath Trays with Cup Holders for Extra Appeal

DIY Bath Trays with Cup Holders for Extra Appeal

DIY Bath Trays with Cup Holders for Extra Appeal

Transform your bath time into a luxurious spa experience with a personalized DIY bath tray. Not only will this handy addition provide a convenient surface for your bath essentials, but it can also be crafted to reflect your individual style. This guide will walk you through the simple steps of building your very own bath tray, complete with cup holders for added functionality and appeal.

Choosing Your Materials

The foundation of your bath tray lies in the materials you select. Here's a breakdown of popular options:

Wood

For a classic and durable bath tray, opt for wood. Cedar and pine are popular choices for their natural resistance to moisture. However, remember to seal the wood properly to prevent water damage.

Plastic

A lightweight and budget-friendly option, plastic is easy to clean and comes in various colors. It's a great choice for a quick and easy DIY project.

Bamboo

Bamboo offers a sustainable and aesthetically pleasing alternative. It's naturally water-resistant and adds a touch of elegance to your bath tray.

Crafting Your Bath Tray

Now that you've chosen your material, it's time to bring your bath tray to life. Follow these step-by-step instructions:

Step 1: Measure and Cut

Measure the desired length and width of your bath tray. Mark the measurements on your chosen material and use a saw to cut the pieces to size. Remember to factor in the thickness of your material when determining the overall dimensions.

Step 2: Create Cup Holders

For the cup holders, you can choose from various options:

  • Use pre-made cup holders: Look for wooden or plastic cup holders that are compatible with your chosen material. Simply attach them to the desired location on your bath tray.
  • Cut out cup holder slots: If you're feeling ambitious, you can use a jigsaw to create custom cup holder slots. Measure the size of your cups and mark the desired location on the tray. Carefully cut out the slots for a snug fit.

Step 3: Assembly

Once you have your tray base and cup holders ready, it's time to assemble the pieces. For wood, use wood glue and screws to create a secure bond. For plastic, you can use strong adhesive or screws. If using pre-made cup holders, simply attach them with screws or glue. If you cut out the slots yourself, ensure the edges are smooth and free of any sharp corners.

Step 4: Sand and Finish

Sand the edges of your bath tray to achieve a smooth finish. If using wood, you can stain or paint it to match your bathroom decor. For plastic, you can use spray paint or vinyl to create a unique design. Remember to seal the tray properly to protect it from moisture and spills.

Adding Extra Appeal

To elevate your DIY bath tray, consider these optional additions:

  • Add a handle: A handle on either side of the tray makes it easier to carry. You can use a pre-made handle or attach a piece of wood or rope.
  • Incorporate a soap dish: Add a small soap dish or create a groove on the tray for storing your favorite bath soap.
  • Create a built-in book holder: Cut a small ledge on the tray to rest your favorite book while you soak.
  • Add a candle holder: Create a groove or small indentation on the tray to safely hold a candle for a calming ambiance.

With a little creativity and a few simple steps, you can craft a personalized bath tray that enhances your relaxation routine. Enjoy the luxurious experience of sipping your favorite beverage and indulging in a soothing bath, all while staying organized and comfortable with your customized DIY bath tray.

Jewelry Box Projects That Are Perfect for Weddings and Special Gifts

Jewelry Box Projects That Are Perfect for Weddings and Special Gifts

Jewelry Box Projects That Are Perfect for Weddings and Special Gifts

Okay, let's talk about jewelry boxes. Not just any jewelry box, but ones that are perfect for special occasions like weddings and gifts. You know, the kind that make people say, "Wow, this is amazing!"

Think about it. A jewelry box is more than just a place to store trinkets. It's a symbol of love, care, and thoughtfulness. It's a little piece of heaven where precious keepsakes are cherished. And when you make it yourself, you're adding a whole new level of personalization and heart.

So, are you ready to unleash your creativity and craft some truly special jewelry boxes? Let's dive in!

Simple and Elegant Jewelry Boxes

Sometimes, less is more. These simple yet elegant projects are perfect for beginners and those who appreciate understated beauty.

The Classic Wooden Box

A classic wooden box is a timeless choice. You can find plain wooden boxes at craft stores or online. From there, the world is your oyster!

Here's how you can personalize it:

  • Paint it: Choose a soft pastel color for a delicate touch or a bold hue for a statement piece.
  • Decoupage it: Cover the box with beautiful paper, fabric, or even vintage maps for a unique touch.
  • Embellish it: Add touches of elegance with pearl accents, rhinestones, or delicate lace.
  • Engrave it: For a truly personal touch, engrave the box with the couple's names, wedding date, or a special message.

The Upcycled Tin Box

Give new life to an old tea tin or cookie tin. The possibilities are endless!

Ideas for your upcycled tin:

  • Paint it with chalkboard paint: The couple can write sweet messages and notes to each other on the lid.
  • Dress it up with fabric: Cover the box with a favorite fabric and add a vintage-inspired ribbon.
  • Add a mirror inside: A small mirror inside the lid makes the box even more practical and glamorous.

Showstopping Jewelry Boxes for the Bold Bride

For the bride who wants a jewelry box as unique and stylish as her wedding dress, these projects are sure to impress.

The Jewelry Box with a Hidden Compartment

This project is perfect for the bride who wants to keep her most treasured pieces safe and sound.

Here's the secret:

  • Create a false bottom: Use a thin piece of wood or cardboard to create a false bottom in the box. You can even paint it or decoupage it to match the box's design.
  • Hide the compartment: The hidden compartment is a secret space for her most valuable pieces. You can even add a small lock for extra security.

The Jewelry Box with Built-in Mirror

Imagine this: a jewelry box with a built-in mirror that's perfect for the bride to admire her beauty on her big day (or any day!).

Here's how to make it happen:

  • Use a small mirror: Find a mirror that fits perfectly inside the lid of the box.
  • Secure it carefully: Attach the mirror to the lid with strong adhesive or a thin piece of wood.
  • Make it fancy: Decorate the mirror with beads, rhinestones, or small flowers to make it even more special.

Jewelry Box Projects That Tell a Story

The most meaningful jewelry boxes are the ones that tell a story. These projects let you capture memories and create lasting keepsakes.

The Scrapbook Jewelry Box

Transform a plain box into a treasure chest of memories!

Ideas for a scrapbook jewelry box:

  • Cover it with photos: Use photos from the couple's journey together, their engagement, and other special moments.
  • Add personal touches: Include ticket stubs, dried flowers from the wedding, or handwritten notes to make it truly unique.
  • Create a timeline: Use photos and dates to trace their relationship timeline on the box.

The Engraved Jewelry Box

Engraved boxes are classic for a reason. It's a timeless way to make a jewelry box truly special.

Here's what you can engrave:

  • The couple's names and wedding date: This is a classic choice that will make the box a treasured heirloom.
  • A special message: A romantic quote, a meaningful lyric, or a simple "I love you" will make the box extra personal.
  • Their initials: This is a subtle and elegant way to personalize the box.

Tips for Making Your Jewelry Box Project a Success

Now that you're brimming with ideas, let's make sure your project turns out beautifully. Here are some tips to keep in mind:

  • Start with quality materials: Use sturdy wood or metal boxes, strong glue, and quality paints for a lasting project.
  • Plan ahead: Sketch out your design and gather all the materials you need before you begin.
  • Take your time: Don't rush! Jewelry boxes are all about the details, so take your time and enjoy the process.
  • Add a personal touch: This is the most important element! Include a small trinket, a handwritten note, or a special piece of jewelry to make the box truly unique.

Commonly Asked Questions

You've got questions, we've got answers!

What kind of glue is best for jewelry box projects?

A strong, all-purpose craft glue like Elmer's or Mod Podge is a great choice for most jewelry box projects. For heavier items like mirrors or metal accents, you may need a more heavy-duty adhesive like epoxy.

What are some good resources for learning how to make jewelry boxes?

YouTube is a goldmine of DIY tutorials! You can find videos for almost any jewelry box project you can imagine. There are also many websites like Pinterest and Etsy that offer step-by-step guides, patterns, and inspiration.

What is the best way to protect a painted or decoupaged jewelry box?

Once your paint or decoupage is dry, seal it with a clear varnish or sealant to protect it from scratches and spills. This will help your jewelry box stay beautiful for years to come.

What are some unique ideas for filling a jewelry box as a gift?

Think beyond jewelry! Here are some unique gift ideas to fill a jewelry box:

  • A personalized charm bracelet
  • A set of vintage earrings
  • A small perfume bottle
  • A handwritten love letter
  • A framed photo of the couple

Creating a jewelry box is a labor of love, and it's a gift that will be cherished for years to come. So get creative, have fun, and let your heart guide you!

Free Beginner Woodworking Plans That Will Help You Make Functional Pieces

Free Beginner Woodworking Plans That Will Help You Make Functional Pieces

Free Beginner Woodworking Plans That Will Help You Make Functional Pieces

Hey there, wood-working newbies! Ready to take the plunge and create some awesome things with your own two hands? I'm here to tell you, woodworking doesn't have to be intimidating. In fact, it can be super rewarding and fun - even if you've never held a saw before.

To get you started, I've rounded up a bunch of free, beginner-friendly woodworking plans that will help you build functional pieces. We're talking about projects that are simple enough for a first-timer, but still give you a sense of accomplishment and leave you with something useful.

The Essential Tools You'll Need

Before we dive into the plans, let's talk about the basics. Here's a list of essential tools you'll need for most beginner projects:

  • Measuring Tape: A must-have for getting everything perfectly sized.
  • Hand Saw: A classic tool for cutting wood.
  • Hammer: For driving nails and assembling pieces.
  • Screwdriver: Both a Phillips head and a flat head screwdriver will come in handy.
  • Safety Glasses: Protect your eyes from flying wood chips.
  • Wood Glue: The glue that holds it all together.
  • Clamps: To hold pieces together while the glue dries.
  • Sandpaper: For smoothing out rough edges and making your project look polished.
  • Pencil: To mark out your cuts and designs.

Of course, you can always add more tools as you get more comfortable and tackle more complex projects, but these will get you started.

Beginner Woodworking Plans

1. Simple Wooden Shelf

A shelf is a great beginner project. You can make it as small or as large as you need, and it's perfect for showcasing your favorite trinkets or organizing your space. You'll learn basic cutting, sanding, and assembling skills. Here's a simple plan for a floating shelf:

  • Materials:
    • Wood boards of your choice
    • Wood glue
    • Wood screws
    • Finishing oil or paint (optional)
  • Instructions:
    • Cut the boards to the desired size using a handsaw.
    • Sand the edges of the boards for a smooth finish.
    • Apply wood glue to the sides of the boards and clamp them together.
    • Once the glue has dried, drill pilot holes and screw the boards together.
    • Apply finishing oil or paint (optional) to seal the wood and enhance its look.

2. Wooden Cutting Board

Who doesn't love a beautiful, handmade cutting board? This is a great project to learn about working with different wood types and applying a protective finish.

  • Materials:
    • Hardwood board (maple or walnut are popular choices)
    • Mineral oil or beeswax (for finishing)
    • Sandpaper (various grits)
  • Instructions:
    • Cut the board to the desired size and shape.
    • Sand the board using progressively finer grits of sandpaper, starting with a coarser grit and finishing with a fine grit.
    • Apply mineral oil or beeswax to seal the wood and prevent moisture absorption.

3. Easy Wooden Birdhouse

Build a little home for our feathered friends! This project introduces you to working with small pieces and creating a more intricate design.

  • Materials:
    • Wood boards (pine or cedar are good options)
    • Wood glue
    • Nails or screws
    • A small piece of wood for the roof (optional)
    • A small piece of wood for the perch (optional)
  • Instructions:
    • Cut the boards into the shapes needed for the birdhouse (base, walls, roof).
    • Use wood glue and nails or screws to assemble the birdhouse.
    • If desired, attach a small piece of wood for the roof and a perch for the birds to land on.
    • Paint or stain the birdhouse (optional).

4. Small Wooden Toolbox

A simple toolbox is a great way to organize your tools or add a rustic touch to your workshop.

  • Materials:
    • Wood boards (plywood or pine are good choices)
    • Wood glue
    • Nails or screws
    • Hinges (for the lid)
    • A small piece of wood for the handle (optional)
  • Instructions:
    • Cut the boards to the desired size for the box and the lid.
    • Use wood glue and nails or screws to assemble the box and lid.
    • Attach hinges to the lid.
    • If desired, attach a small piece of wood for a handle.
    • Sand and paint or stain the toolbox (optional).

5. Rustic Wooden Plant Stand

Add a touch of natural beauty to your home with a plant stand. This project helps you learn about creating angled cuts and assembling a structure.

  • Materials:
    • Wood boards (pine or cedar are good options)
    • Wood glue
    • Nails or screws
    • A piece of plywood for the top (optional)
  • Instructions:
    • Cut the boards for the legs and the top of the plant stand.
    • Make angled cuts on the legs to create the desired look.
    • Use wood glue and nails or screws to assemble the legs and the top.
    • If desired, attach a piece of plywood to the top of the plant stand for a flat surface.
    • Sand and paint or stain the plant stand (optional).

Tips for Success

  • Start Small: Don't overwhelm yourself with complex projects. Begin with simple plans and gradually build up your skills.
  • Read the Instructions Carefully: Make sure you understand the steps before you start.
  • Take Your Time: Woodworking is about precision, so don't rush.
  • Measure Twice, Cut Once: This is a classic woodworking adage that's true for a reason.
  • Practice Makes Perfect: The more you build, the better you'll become. Don't be afraid to experiment and learn from your mistakes.
  • Safety First: Wear safety glasses and ear protection when working with power tools.

Commonly Asked Questions

Where can I find free woodworking plans?

There are tons of great resources online! Here are a few places to start:

  • Pinterest
  • YouTube
  • Ana White's website
  • The Woodworking for Mere Mortals website

What type of wood should I use for beginner projects?

Pine is a great choice for beginners because it's inexpensive, easy to work with, and forgiving. You can also try other softwoods like cedar or fir.

What are the best finishes for wood?

There are lots of options! Mineral oil and beeswax are simple and effective choices. You can also use paint, stain, or varnish to create different looks.

How do I learn more about woodworking?

You can check out books, websites, and online courses. There are also plenty of woodworking clubs and workshops where you can connect with experienced woodworkers and learn from them.

Ready to get started? Choose a plan, gather your materials, and get creating! Who knows, you might just discover a hidden talent for woodworking.

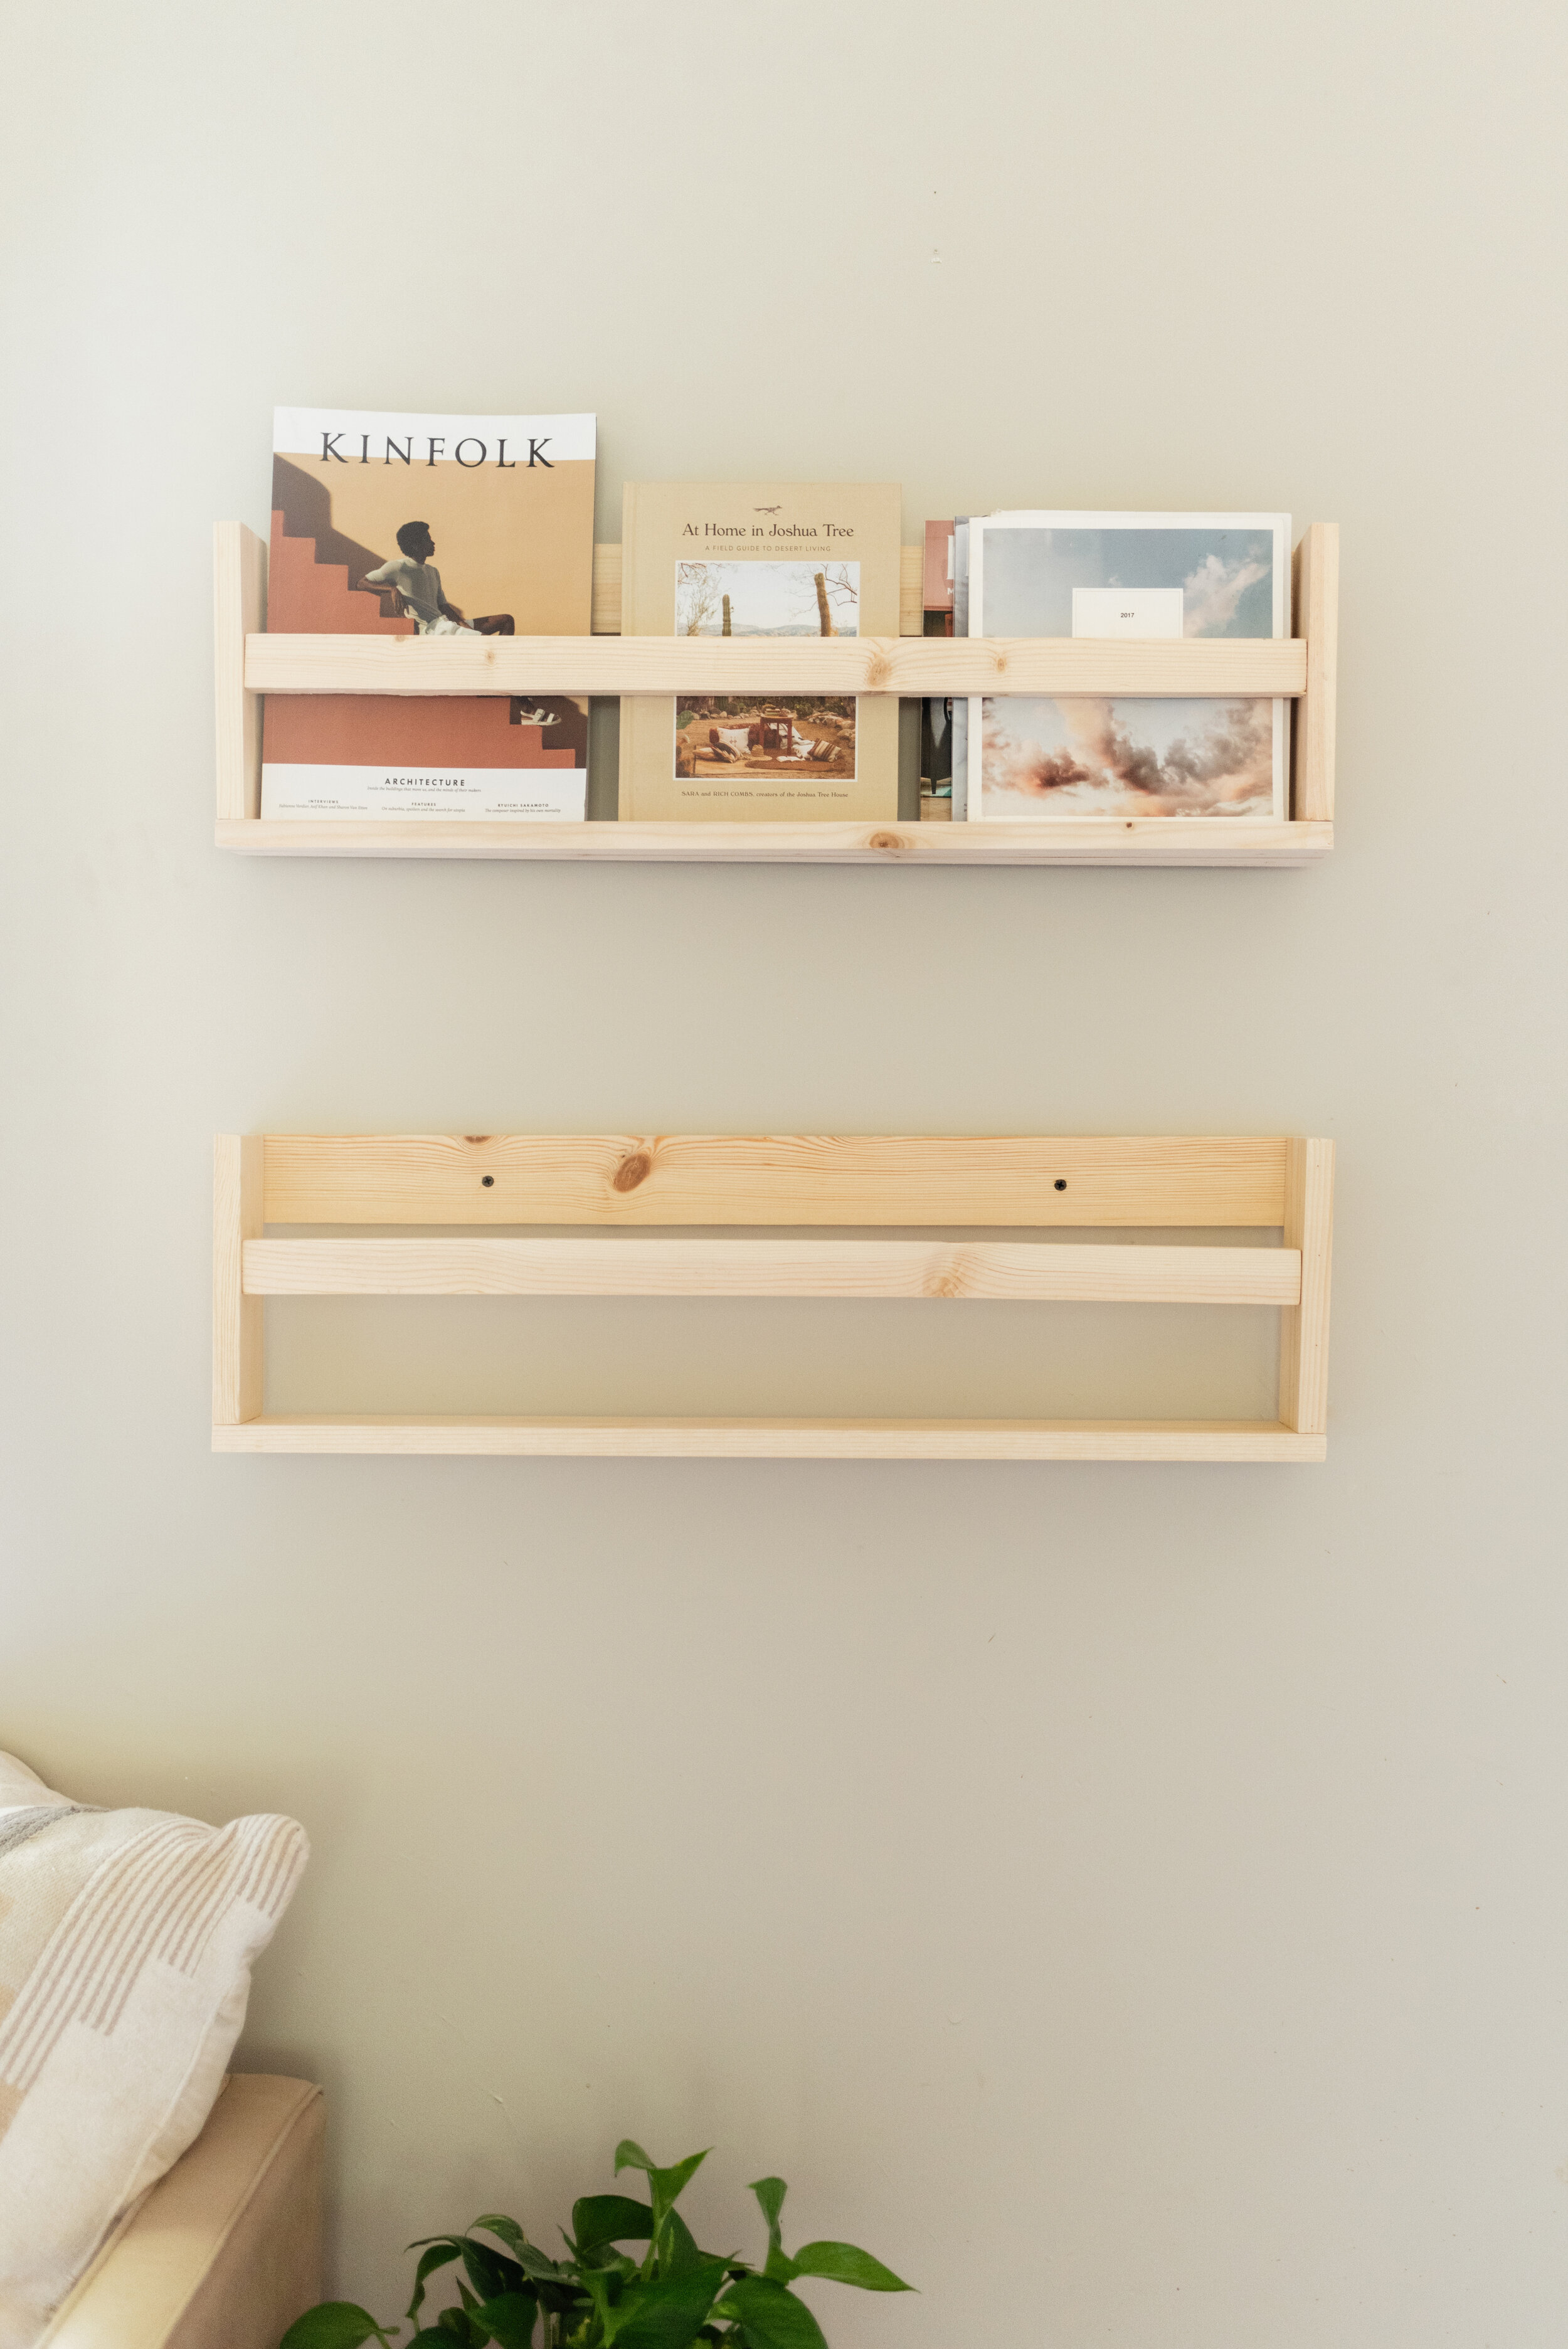
How to Build and Sell Wooden Magazine Racks with a Farmhouse or Coastal Look

How to Build and Sell Wooden Magazine Racks with a Farmhouse or Coastal Look

Building and Selling Wooden Magazine Racks with a Farmhouse or Coastal Look

In the realm of home decor, magazine racks are more than just functional pieces; they are statement-making elements that reflect personal style and enhance the aesthetic of a living space. The growing popularity of farmhouse and coastal styles has opened up lucrative opportunities for skilled woodworkers to build and sell magazine racks that capture these coveted aesthetics.

This article will guide you through the process of crafting and marketing wooden magazine racks with a farmhouse or coastal look, empowering you to capitalize on this thriving market.

Understanding the Farmhouse and Coastal Aesthetics

Before diving into construction, it's essential to grasp the defining characteristics of farmhouse and coastal design styles, which will influence your design choices.

Farmhouse Style

Farmhouse decor embodies a rustic charm, drawing inspiration from traditional farmhouses. Its key elements include:

  • Natural materials: Wood, especially reclaimed or weathered wood, takes center stage. Metal accents are often used for hardware and structural components.
  • Neutral color palettes: Whites, creams, grays, and browns dominate, creating a calming and inviting atmosphere.
  • Simple and functional designs: Farmhouse furniture often features clean lines and practical designs. Distressed finishes and hardware add character and authenticity.
  • Rustic textures: Natural fabrics like linen and burlap are commonly incorporated, along with distressed wood and metal accents.

Coastal Style

Coastal decor captures the essence of seaside living, evoking feelings of relaxation and tranquility. Its key elements include:

  • Light and airy colors: Blues, greens, whites, and creams create a breezy and refreshing ambiance.
  • Natural materials: Driftwood, seashells, rope, and nautical elements are frequently incorporated, adding a touch of the ocean.
  • Textured surfaces: Natural fibers like jute and sisal add a tactile element, while weathered wood and rope bring in a coastal feel.
  • Nautical motifs: Anchors, ships' wheels, and other maritime symbols are often used as decorative accents.

Designing and Building Your Magazine Racks

With a clear understanding of the desired aesthetics, you can start designing and building your magazine racks.

Design Considerations

  • Shape and Size: Consider the dimensions of magazines and the available space where the rack will be placed. Classic rectangular shapes work well for both styles, but you can also explore unique designs like tiered shelves, angled compartments, or even freestanding units.
  • Material Selection: Opt for quality wood that complements the desired style. Reclaimed barn wood, weathered pine, or even salvaged pallet wood offer a farmhouse feel, while light-colored woods like maple or birch evoke a coastal vibe.
  • Finishes: Choose stains and paints that enhance the desired aesthetic. For farmhouse, use natural wood stains with a distressed or weathered look. Coastal styles often feature white washes, light blues, or even a touch of driftwood grey.
  • Hardware: Choose simple and functional hardware that complements the chosen style. For farmhouse, consider rustic metal hooks, handles, or brackets. Coastal styles often feature polished nickel, chrome, or even rope accents.

Construction Process

  • Cutting and Assembling: Create a detailed plan and cut the wood pieces to size. Use precise joinery techniques, such as dado joints, rabbet joints, or mortise-and-tenon joints, for a sturdy and durable rack.
  • Finishing: Sand the wood to a smooth finish. Apply stains, paints, or finishes as desired. Consider distressing the wood or adding decorative elements like rope, shells, or metal accents to enhance the desired aesthetic.
  • Hardware Installation: Securely install hinges, brackets, handles, or any other hardware that complements the chosen design.
  • Quality Control: Thoroughly inspect the finished rack for any imperfections and ensure it is sturdy and functional.

Marketing and Selling Your Wooden Magazine Racks

With your expertly crafted magazine racks ready for sale, it's time to market them effectively to reach your target audience.

Target Market

Focus your marketing efforts on individuals and businesses who appreciate farmhouse or coastal decor styles. This could include:

  • Homeowners: Target those who are decorating their homes in these styles. Utilize online platforms, social media, and local home decor stores.
  • Interior designers: Partner with interior designers who specialize in farmhouse or coastal design. Offer them wholesale pricing and samples.
  • Retail stores: Approach local furniture stores, gift shops, or home decor boutiques that cater to these styles. Provide them with your catalog and offer competitive wholesale rates.

Marketing Strategies

  • High-Quality Photography: Showcase your magazine racks in beautiful and professionally shot photos that highlight their design details and appeal to your target audience.
  • Social Media Presence: Create engaging social media content that features your products and stories about your craft. Use relevant hashtags and engage with potential customers.
  • Online Marketplaces: List your magazine racks on popular online marketplaces like Etsy, Shopify, or Amazon to expand your reach and gain access to a wider customer base.
  • Local Craft Shows and Markets: Participate in local craft fairs and markets to connect directly with customers and showcase your work. Offer demonstrations and personalized interactions.
  • Word-of-Mouth Marketing: Encourage satisfied customers to share their positive experiences through referrals and online reviews. This can significantly boost your visibility and credibility.

Conclusion

Building and selling wooden magazine racks with a farmhouse or coastal look presents a rewarding and potentially lucrative business opportunity. By mastering the techniques of woodworking, understanding the desired aesthetics, and implementing effective marketing strategies, you can establish a thriving business that caters to the growing demand for these stylish and functional pieces.

Remember, the key to success lies in your passion for woodworking, your attention to detail, and your dedication to creating high-quality pieces that resonate with your target market. With creativity, hard work, and a keen understanding of your audience, you can carve out a successful niche in the world of handmade home decor.

How to Make and Sell Outdoor Benches with a Customizable Design for Different Spaces

How to Make and Sell Outdoor Benches with a Customizable Design for Different Spaces

Crafting and Selling Customizable Outdoor Benches: A Comprehensive Guide

In the realm of outdoor living, benches serve as versatile and timeless additions. Beyond providing seating, they enhance aesthetics, create gathering spaces, and invite moments of relaxation. Embracing the trend of customization, you can establish a lucrative business by crafting and selling outdoor benches with diverse design options to cater to a wide range of spaces and preferences.

Market Research and Target Audience Identification

Before embarking on your bench-making journey, conduct thorough market research to understand the demand, competition, and potential customer base. Identify your target audience:

  • Residential homeowners: Focus on homeowners seeking aesthetic enhancements for their patios, gardens, and outdoor living areas.
  • Commercial businesses: Explore opportunities with cafes, restaurants, hotels, parks, and other establishments looking for stylish and durable seating.
  • Landscape designers and architects: Partner with professionals who incorporate benches into their projects, offering customized designs to complement specific outdoor spaces.

Determining Your Niche and Unique Selling Proposition (USP)

Once you've identified your target audience, define your niche and unique selling proposition (USP) to differentiate yourself in the competitive landscape. Consider:

  • Material Specialization: Focus on a specific material, such as reclaimed wood, metal, or sustainable bamboo, to create a distinct brand identity.
  • Style Focus: Specialize in a particular style, like modern, rustic, minimalist, or traditional, to cater to specific aesthetics.
  • Customization Extravaganza: Offer a wide array of customization options, including wood finishes, fabric choices, metal accents, and bespoke engravings, to appeal to individual tastes.

Product Development and Design Considerations

Designing and developing your bench collection involves careful consideration of several factors:

Functionality and Comfort

  • Seating Height and Depth: Optimize seating height for comfortable lounging, and ensure sufficient depth to accommodate various body types.
  • Backrest Design: Choose a backrest style that offers adequate support, ranging from full backs to minimalist designs.
  • Armrests: Include armrests for enhanced comfort and a sense of enclosure, considering different styles and placements.

Materials and Durability

  • Wood: Select durable hardwoods like teak, cedar, or redwood, known for their weather resistance and longevity. Consider sustainable sourcing and certifications.
  • Metal: Explore options like iron, steel, and aluminum, ensuring proper rust prevention and powder coating for outdoor use.
  • Fabric: Choose weather-resistant fabrics like acrylics, olefins, or Sunbrella, available in diverse colors and patterns for upholstery.

Aesthetics and Style

  • Design Simplicity or Complexity: Balance functionality with aesthetics, offering options ranging from minimalist designs to intricate carvings or metalwork.
  • Color Palette and Finishes: Select a color palette that complements outdoor spaces, offering natural wood tones, vibrant paints, or aged metal finishes.
  • Customization Options: Provide a wide range of personalization features like engraving, fabric selection, and decorative accents.

Production and Manufacturing Processes

After finalizing your bench designs, establish your production process, ensuring efficiency and quality control. Consider these factors:

  • Workshop Setup: Invest in appropriate tools and equipment, including woodworking machinery, metal fabrication tools, and sewing machines, depending on your chosen materials and designs.
  • Materials Sourcing: Secure reliable suppliers for high-quality materials, ensuring consistency and timely delivery.
  • Production Flow: Develop a streamlined production process, from material preparation and assembly to finishing and packaging, to maintain efficiency and quality.

Marketing and Sales Strategies

To reach your target audience and drive sales, implement a comprehensive marketing strategy that leverages various channels:

Online Presence

  • Website Development: Create a professional website showcasing your bench designs, customization options, pricing, and testimonials.
  • Social Media Marketing: Utilize platforms like Instagram, Facebook, and Pinterest to showcase visually appealing imagery of your benches in various settings, highlighting their versatility and customization options.
  • E-commerce Integration: Integrate an e-commerce platform for online sales, ensuring secure payment processing and convenient order management.

Offline Marketing

  • Local Market and Craft Fairs: Participate in local events to directly connect with potential customers, showcasing your products and fostering relationships.
  • Partnerships with Landscape Designers and Architects: Collaborate with professionals to incorporate your benches into their design projects, increasing brand visibility and referrals.
  • Print Advertising: Consider targeted print advertising in local publications or relevant industry magazines to reach specific demographics.

Pricing and Profitability

Establish a pricing strategy that balances profitability with market demand. Consider these factors:

  • Cost of Materials: Accurately calculate the cost of materials, including wood, metal, fabric, hardware, and finishing supplies.
  • Labor Costs: Factor in labor costs, including your time and any additional labor expenses involved in production.
  • Overhead Expenses: Account for overhead expenses like rent, utilities, insurance, and marketing costs.
  • Profit Margin: Set a competitive profit margin that ensures financial sustainability while remaining attractive to customers.

Customer Service and After-Sales Support

Provide exceptional customer service to build trust and loyalty. Consider:

  • Personalized Consultations: Offer personalized consultations to understand customer needs and preferences, guiding them through customization options.
  • Clear Communication: Maintain transparent communication throughout the order process, providing updates on production timelines and delivery status.
  • Warranties and Guarantees: Offer warranties or guarantees on your products, demonstrating confidence in their quality and durability.

Expanding Your Business and Future Growth

Once you've established a solid foundation, explore opportunities for expansion and growth:

  • Product Line Expansion: Introduce new bench designs, styles, or materials to broaden your product offering and attract a wider customer base.
  • Wholesale Partnerships: Explore partnerships with retailers or wholesalers to expand your distribution network and reach a larger market.
  • Custom Orders and Commissions: Accept custom orders for unique bench designs tailored to specific client needs and preferences.

By meticulously planning, designing, and marketing your customizable outdoor benches, you can carve a niche in the market, delight customers with personalized solutions, and create a thriving business that enhances outdoor living spaces.

How to Make and Sell Custom Wooden Wall Clocks

How to Make and Sell Custom Wooden Wall Clocks

Crafting and Selling Your Own Custom Wooden Wall Clocks: A Guide to Time-Telling Art

Ever considered turning your woodworking skills into a creative business? Crafting and selling custom wooden wall clocks is a fantastic way to blend artistic expression with entrepreneurial spirit. Let's dive into the exciting world of building and selling these unique timepieces!

1. Designing Your Dream Clocks

Before you pick up a saw, it's time to unleash your creative side. This stage is all about visualizing the clocks you want to build and sell.

1.1. Finding Inspiration

Look around you! Where do you find inspiration? Browse online platforms like Pinterest, Instagram, and Etsy for wooden clock designs that catch your eye. Maybe you're drawn to minimalist aesthetics, rustic farmhouse charm, or intricate geometric patterns. Don't be afraid to mix and match styles to create something truly unique.

1.2. Sketching Your Ideas

Grab a pencil and paper (or open your favorite drawing app) and start sketching your clock designs. Get your ideas down, explore different shapes, and play around with clock face styles. Consider incorporating elements like:

  • Unique Shapes: Think beyond circles. Hexagons, squares, ovals, or even free-form designs can add character.
  • Wood Varieties: Experiment with different wood typesâ€"cherry, walnut, oak, mapleâ€"for a variety of textures and colors.
  • Embellishments: Incorporate metal accents, etched designs, or hand-painted details. The possibilities are endless!

1.3. Functionality Meets Form

Don't forget about functionality! Consider the following:

  • Clock Mechanism: Choose a reliable, quiet clock mechanism. There are many affordable options available online.
  • Clock Hands: Select hands that complement the overall design of your clock.
  • Hanging Mechanism: Decide if you want to use a keyhole slot, a D-ring, or a hook for hanging.

2. Building Your Masterpieces

With your designs finalized, it's time to get your hands dirty (or clean, depending on your woodworking space)! Here's a breakdown of the building process:

2.1. Gathering Your Tools

Gather your woodworking essentials. This could include:

  • Saw: A table saw, circular saw, or jigsaw will be your main cutting tools.
  • Sandpaper: Use different grits to smooth your wood surfaces.
  • Drill: A drill is essential for creating holes for the clock mechanism and hands.
  • Clamps: Clamps will help hold your pieces together while you glue them.
  • Wood Glue: Choose a strong, reliable wood glue.

2.2. Cutting and Shaping the Clock Base

Use your chosen saw to cut your wood to the desired shape and size. Be precise with your measurements and ensure that all your pieces fit together perfectly.

2.3. Assembling the Clock

Carefully glue the pieces of your clock together, using clamps to ensure a secure bond. Let the glue dry completely before moving on.

2.4. Installing the Mechanism

Drill a hole in the back of your clock for the clock mechanism and carefully install it. Attach the clock hands and ensure they move smoothly.

2.5. Finishing Touches

Sand your clock base and edges until smooth. Apply a sealant or finish to protect the wood and give it a desired look (e.g., oil, varnish, wax). Add any embellishments you've planned, like metal accents or hand-painted details.

3. Selling Your Time-Telling Creations

You've poured your heart and soul into creating beautiful clocks. Now, it's time to share them with the world!

3.1. Defining Your Target Market

Who are your ideal customers? Understanding your target audience will help you market your clocks effectively. Are you aiming for rustic farmhouse lovers, modern minimalists, or anyone in between?

3.2. Setting Your Prices

Pricing your clocks is a balancing act. Factor in:

  • Cost of Materials: Calculate the cost of the wood, clock mechanism, and any embellishments you use.
  • Time and Labor: Don't undervalue your time and skill. Consider the time spent on designing, building, and finishing each clock.
  • Competitive Market: Research what other wooden clock makers are charging and adjust your pricing accordingly.

3.3. Choosing Your Sales Channels

The good news is that there are many avenues for selling your custom wooden clocks! Some options include:

  • Etsy: Etsy is a popular online marketplace specifically designed for handmade and vintage goods. It has a built-in community of buyers interested in unique, handcrafted items.
  • Your Own Website: Creating a dedicated website gives you control over your branding and allows you to showcase your clocks in detail.
  • Social Media: Platforms like Instagram and Facebook are fantastic for sharing photos of your clocks and engaging with potential customers.
  • Local Craft Fairs and Markets: Connect with customers in person at craft fairs and markets. This is a great way to showcase your work, get feedback, and build relationships with potential buyers.

3.4. Marketing Your Clocks

Once you've established your sales channels, it's time to get the word out about your beautiful creations! Some effective marketing strategies include:

  • High-Quality Photos: Invest in taking professional-looking photos of your clocks. This will make them visually appealing and attract buyers.
  • Compelling Descriptions: Write detailed descriptions that highlight the unique features and craftsmanship of each clock.
  • Engaging Social Media: Post regularly on your social media channels to showcase your work, share behind-the-scenes glimpses of your creative process, and engage with your followers.
  • Collaborations: Partner with other artists, influencers, or businesses for cross-promotion.
  • Customer Service: Respond promptly to inquiries, address customer concerns, and go the extra mile to provide excellent service.

4. Commonly Asked Questions

4.1. What kind of wood should I use for my clocks?

The best wood for your clocks depends on your desired aesthetic and budget. Some popular choices include:

  • Oak: Known for its durability and warm color.
  • Walnut: Prized for its rich brown hue and intricate grain patterns.
  • Maple: Offers a lighter, more contemporary look with beautiful grain.
  • Cherry: Has a warm, reddish-brown color that deepens with age.

4.2. How do I find a reliable clock mechanism?

You can find various clock mechanisms online from retailers specializing in crafting supplies. Look for mechanisms that are quiet and accurate.

4.3. Do I need to be a professional woodworker to make clocks?

Not at all! You can start with simple designs and gradually work your way up to more complex pieces. There are countless resources available online, including woodworking tutorials and communities, to help you learn the skills you need.

4.4. How can I get my clocks into local stores?

Reaching out to local boutiques, gift shops, or home decor stores is a great way to get your clocks in front of a wider audience. Prepare a professional portfolio showcasing your work and a clear sales pitch.

4.5. What are some tips for selling my clocks online?

Here are some tips for maximizing your online sales:

  • High-Quality Photos: Use professional, well-lit photos that showcase the beauty and detail of your clocks.
  • Compelling Descriptions: Write detailed descriptions that highlight the unique features and craftsmanship of each clock.
  • Competitive Pricing: Research what other makers are charging and price your clocks competitively.
  • Positive Reviews: Encourage customers to leave reviews, as positive reviews build trust and credibility.
  • Customer Service: Respond promptly to inquiries, address customer concerns, and provide excellent service.

With your creativity, craftsmanship, and a little dedication, you can turn your love of woodworking into a successful business. Get ready to create beautiful clocks that tick with your personal style and bring joy to your customers!

Step-by-Step Guide to Making Wooden Toys for Sale

Step-by-Step Guide to Making Wooden Toys for Sale

Turning Wood into Treasure: A Step-by-Step Guide to Making Wooden Toys for Sale

In a world saturated with plastic and digital entertainment, wooden toys offer a unique charm and enduring quality. They not only capture the hearts of children but also appeal to parents seeking eco-friendly and imaginative playthings. If you possess a passion for woodworking and an entrepreneurial spirit, crafting and selling wooden toys can be a fulfilling and profitable venture.

This guide will walk you through the process of transforming your woodworking skills into a thriving business, offering step-by-step instructions and valuable tips to help you create beautiful, durable, and marketable wooden toys. Get ready to unleash your creativity and embark on a journey that blends craftsmanship with entrepreneurial spirit.

1. Finding Your Niche and Defining Your Target Market

Before diving into the workshop, it's crucial to define your niche and identify your target market. This will shape your design choices, pricing strategies, and marketing efforts.

1.1. What Kind of Wooden Toys Will You Make?

Consider the following factors when deciding on your toy niche:

  • Age Group: Will you focus on babies, toddlers, preschoolers, or older children?
  • Toy Category: Do you envision creating educational toys, imaginative playsets, or traditional wooden toys like blocks or rocking horses?
  • Design Aesthetics: Will your toys be minimalist and modern, rustic and charming, or whimsical and colorful?

1.2. Who are Your Ideal Customers?

Understanding your target market is essential for marketing and branding. Ask yourself:

  • Where do they shop? Online marketplaces, craft fairs, or specialty stores?
  • What are their values? Do they prioritize sustainability, handmade quality, or unique designs?
  • What are their price points? Are they looking for affordable toys or premium handcrafted items?

2. Gathering the Right Tools and Materials

Once you have a clear vision for your wooden toys, it's time to equip your workshop with the necessary tools and materials.

2.1. Essential Woodworking Tools

A well-stocked workshop is essential for crafting high-quality wooden toys. Invest in:

  • Hand Tools: Saw, hammer, screwdrivers, chisels, sandpaper, measuring tape, and clamps.
  • Power Tools: Drill, jigsaw, sander, and possibly a table saw or band saw, depending on your complexity level.
  • Safety Gear: Safety glasses, dust mask, ear protection, and work gloves.

2.2. Selecting the Right Wood

Choose wood species that are safe for children, durable, and aesthetically pleasing:

  • Hardwoods: Maple, oak, cherry, and walnut offer strength and durability.
  • Softwoods: Pine and cedar are affordable and work well for simpler toys.
  • Plywood: Offers stability and is often used for intricate designs.

2.3. Finishing Touches

Add a touch of magic with safe and non-toxic finishes:

  • Water-Based Paints: Safe for children and offer a wide range of colors.
  • Natural Oils: Enhance the wood's natural beauty and provide a protective layer.
  • Non-Toxic Varnish: Creates a durable and waterproof finish.

3. Designing and Creating Your Wooden Toys

With the right tools and materials, you're ready to bring your wooden toy designs to life.

3.1. Sketching and Prototyping

Start with sketches and prototypes to refine your design and ensure functionality. Consider factors like:

  • Size and Scale: Appropriate for the age group and play purposes.
  • Ergonomics: Comfortable grip and easy manipulation.
  • Durability: Able to withstand repeated use and rough play.

3.2. Cutting and Shaping

Use precision and safety when cutting and shaping wood. Follow these tips:

  • Measure Twice, Cut Once: Accuracy prevents rework and waste.
  • Use Proper Cutting Techniques: Safe and effective cutting methods ensure clean lines and smooth edges.
  • Sand Smooth: Eliminate rough edges and splinters for a safe and enjoyable play experience.

3.3. Assembly and Finishing

Assemble the toy with care and precision, ensuring a strong and secure build. Apply finishes thoughtfully:

  • Secure Joints: Use glue, screws, or dowels for sturdy connections.
  • Smooth Surfaces: Sand and finish to a smooth and polished look.
  • Safety First: Ensure all finishes are non-toxic and child-safe.

4. Marketing and Selling Your Wooden Toys

Once your wooden toys are ready, it's time to get them into the hands of delighted customers. Explore these marketing and selling strategies:

4.1. Establish an Online Presence

Create an online store or sell through online marketplaces:

  • Etsy: A popular platform for handmade and vintage items.
  • Amazon Handmade: Offers wider reach and potential for bulk orders.
  • Your Own Website: Provides a dedicated space to showcase your brand and products.

4.2. Participate in Craft Fairs and Markets

Connect directly with customers and showcase your work:

  • Local Craft Fairs: Great for building a local customer base.
  • Children's Shows: Target families and young children directly.
  • Holiday Markets: Capitalize on the gift-giving season.

4.3. Build a Strong Brand Identity

Develop a cohesive brand that reflects your values and resonates with your target audience:

  • Brand Name: Creative and memorable.
  • Logo and Visuals: Unique and consistent across all platforms.
  • Storytelling: Share your passion for woodworking and the inspiration behind your toys.

5. Pricing Your Wooden Toys

Pricing your toys fairly is crucial for profitability and attracting customers:

5.1. Consider Your Costs

Factor in the cost of:

  • Materials: Wood, finishes, hardware, and packaging.
  • Labor: Time spent designing, crafting, and finishing.
  • Overhead: Workshop rent, utilities, and marketing expenses.

5.2. Research Competitive Pricing

See what similar wooden toys are selling for on the market. You can adjust your pricing based on:

  • Quality and Complexity: Handmade toys often command higher prices.
  • Target Market: Luxury brands might command higher prices.
  • Marketing and Sales Channels: Online marketplaces often have fees that impact pricing.

5.3. Factor in Profit Margin

Ensure your pricing allows for a healthy profit margin to sustain your business. A general guideline is 20-30% profit margin, but this can vary depending on your costs and pricing strategy.

6. Scaling Your Wooden Toy Business

As your business grows, you'll need to scale your production and operations:

6.1. Automate Processes

Explore ways to automate repetitive tasks:

  • Laser Cutting: Precise cutting for intricate designs.
  • CNC Machining: High-precision for complex shapes.
  • Sanding Machines: Efficient and consistent sanding.

6.2. Delegate Tasks

Consider outsourcing or hiring help for tasks that are time-consuming or require specialized skills:

  • Packaging and Shipping: Ensure efficient and timely delivery.
  • Customer Service: Provide excellent support to customers.
  • Marketing and Social Media: Enhance your online presence.

6.3. Expand Your Product Line

Offer new and innovative toys to keep your customers engaged:

  • Seasonal Toys: Tap into holiday themes and special occasions.
  • New Designs: Embrace trends and introduce fresh ideas.
  • Custom Orders: Cater to individual preferences and create unique pieces.

7. Conclusion: Embracing the Journey of Wooden Toy Making

Creating and selling wooden toys is a rewarding journey that combines creativity, craftsmanship, and entrepreneurial spirit. By following these steps, you can turn your woodworking passion into a successful business. Remember to embrace the learning process, adapt to changing trends, and always prioritize the joy of crafting beautiful, lasting toys for children to cherish.