Friday, November 15, 2024

How to Craft and Sell Modern Coffee Tables That Reflect Contemporary Trends

How to Craft and Sell Modern Coffee Tables That Reflect Contemporary Trends

From Coffee Klatch to Cool Statement: Crafting and Selling Modern Coffee Tables That Rock

Hey there, fellow furniture fanatics! You know, coffee tables aren't just about holding your morning latte and the latest issue of Architectural Digest. They're the anchor of your living room, the stage for your home decor, and a chance to express your personal style. And right now, the hottest trend in coffee tables is all about modern, minimalist designs with a touch of edge.

So, you wanna join the cool kids and create your own line of modern coffee tables? Awesome! Let's dive into the nitty-gritty of crafting, marketing, and selling coffee tables that scream "contemporary chic".

Mastering the Modern Aesthetic: Design That Makes a Statement

Think clean lines, bold shapes, and materials that are both durable and eye-catching. Here's what to keep in mind:

Form Follows Function (And Style)

Modern coffee tables are all about purpose. They should be functional, providing ample space for books, magazines, or even that awesome record player you just snagged. But that doesn't mean they have to be boring. Look for ways to integrate storage, like hidden compartments or drawers, into the design. This is a win-win situation: it's practical and adds a sleek, minimalist touch.

Material Magic: Beyond the Basics

Forget the traditional oak and mahogany. Modern design thrives on unexpected materials that make a statement. Here are some favorites:

  • Metal: Think steel, brass, or even copper. They're durable, versatile, and add a touch of industrial chic.
  • Glass: Clear glass tops are a classic choice for a modern look, but don't shy away from textured glass or tinted glass for a more unique vibe.
  • Stone: Slate, marble, or even concrete give a coffee table an earthy, luxurious feel. Just make sure you choose a stone that's durable enough for everyday use.
  • Wood: Yes, wood can be modern! Opt for light-colored woods like ash or maple, or experiment with reclaimed wood for a rustic-industrial look.
  • Acrylic: For a totally futuristic look, acrylic is your best bet. It's clear, lightweight, and incredibly versatile.

Color Me Modern

Modern coffee tables are often characterized by their use of neutral colors. Think black, white, gray, or beige. But don't be afraid to add pops of color with accent pieces or unique upholstery. Just remember, too many colors can clash with the minimalist aesthetic.

From Workshop to Marketplace: Crafting a Winning Business

Now that you've got the design chops, it's time to get down to business. Here's a roadmap for crafting and selling your modern coffee table masterpiece:

Skill Up: The Craft of Coffee Table Creation

Before you start building, hone your skills. Here's a crash course:

  • Master the Basics: Start with basic woodworking skills. Know how to cut, shape, and assemble wood. Learn about different joinery techniques like mortise and tenon or dovetail joints.
  • Metalwork Mastery: If you're working with metal, learn the art of welding, cutting, and shaping. There are tons of online tutorials and courses available.
  • Glass and Stone Savvy: Work with a glass or stone fabricator if you're not experienced with these materials. They can help you get the perfect look and ensure the piece is structurally sound.

Tools of the Trade: Invest in Your Success

You'll need the right tools to create those modern marvels. Here's what you need to get started:

  • Power Tools: A circular saw, drill, sander, and router are essential.
  • Hand Tools: Chisels, hammers, measuring tools, clamps, and a good quality screwdriver set are must-haves.
  • Finishing Touches: Get a good quality wood finish, paint, and sealant to protect your creations and give them a polished look.

Selling Your Style: Finding Your Market

Got your coffee tables ready to shine? Now it's time to connect with your audience.

Embrace the Online World

The internet is your oyster! Set up an online shop, use social media to showcase your work, and consider selling through platforms like Etsy or Shopify. Don't forget to use high-quality photos and write engaging product descriptions.

Offline Opportunities

Expand your reach beyond the digital realm. Consider these options:

  • Local Craft Fairs: Connect directly with customers and showcase your unique style at local markets and craft fairs.
  • Collaboration with Interior Designers: Partner with designers who are looking for unique pieces to furnish their projects.
  • Consignment Shops: List your tables with reputable consignment shops, giving them a chance to be seen by a wider audience.

Building Your Brand: Style, Story, and Sales

It's not just about making beautiful furniture; it's about building a brand that resonates with customers. Here are some tips to make your business stand out:

Define Your Style

What makes your coffee tables unique? Are they sleek and minimalist? Industrial-inspired? Rustic chic? Develop a signature style that sets you apart and attracts your target audience.

Tell Your Story

People love a good story! Share your passion for design, the inspiration behind your creations, and the craftsmanship that goes into each piece. This helps you build a connection with customers and make them feel like they're buying more than just a coffee table.

Price it Right

Research your market and price your tables competitively. Consider the materials, time spent, and your profit margin. Remember, you're selling quality and design, so don't undervalue your work.

Customer Care Is Key

Provide excellent customer service! Respond promptly to inquiries, address any concerns, and ensure your customers have a positive experience. Word-of-mouth referrals are gold in the furniture business.

And there you have it! Crafting and selling modern coffee tables can be a fulfilling and rewarding journey. With a blend of creativity, skill, and a touch of marketing magic, you can turn your passion into a thriving business and leave your mark on the world of furniture design. Now go out there and create something amazing!

Thursday, November 14, 2024

Profitable Bath Tray Projects for Craft Market Success

Profitable Bath Tray Projects for Craft Market Success

Profitable Bath Tray Projects for Craft Market Success

In the bustling world of craft markets, capturing the attention of discerning shoppers requires a unique blend of creativity, functionality, and profitability. Bath trays, with their inherent appeal and practicality, present an excellent opportunity to carve a niche and generate consistent sales. This article delves into a comprehensive guide to crafting profitable bath tray projects that resonate with customers and drive your craft market success.

Identifying the Target Market and Trends

Before embarking on any craft project, understanding your target market is crucial. Bath trays cater to a diverse audience, ranging from busy professionals seeking relaxation to home décor enthusiasts seeking stylish accents. To effectively market your creations, conduct thorough market research to identify:

Demographics

  • Age range
  • Gender
  • Lifestyle preferences
  • Budget considerations

Current Trends

Stay updated with current trends in home décor and bath accessories. Popular themes and styles to consider include:

  • Minimalist aesthetics
  • Bohemian and earthy tones
  • Natural materials like bamboo and wood
  • Sustainable and eco-friendly practices

Crafting Profitable Bath Tray Designs

The key to crafting profitable bath tray projects lies in balancing practicality and visual appeal. Consider these design elements:

Functionality

  • Size and Dimensions: Ensure the tray comfortably accommodates essential bath items like books, candles, and beverages.
  • Material Choice: Select durable materials like wood, bamboo, or acrylic that can withstand moisture and frequent use.
  • Storage Options: Incorporate built-in compartments, slots, or raised edges to hold items securely.
  • Non-slip Surface: Utilize rubber feet or a textured base to prevent slippage on wet surfaces.

Visual Appeal

  • Color Palette: Choose a color scheme that complements bathroom décor and evokes relaxation and tranquility.
  • Texture and Finish: Explore various textures and finishes, from smooth polished surfaces to distressed wood for a rustic feel.
  • Decorative Elements: Incorporate decorative touches like engraved patterns, painted designs, or mosaic tiles.
  • Personalization Options: Offer customization options to personalize the tray with names, initials, or special messages.

Materials and Tools for Bath Tray Construction

The materials and tools you need will depend on your chosen design and construction method. Here are some common choices:

Materials

  • Wood: Cedar, pine, or redwood are suitable options due to their natural resistance to moisture.
  • Bamboo: A sustainable and lightweight alternative with a natural appeal.
  • Acrylic: A durable and easy-to-clean option for a modern look.
  • Epoxy Resin: Used to create unique designs and incorporate various elements.
  • Hardware: Rubber feet, handles, hinges, and other necessary components.
  • Paint and Stain: To color and protect the wood or acrylic surfaces.
  • Decorative Elements: Tiles, mosaic pieces, stencils, etc., to add visual interest.

Tools

  • Saw: For cutting wood or acrylic.
  • Sandpaper: For smoothing surfaces and creating a uniform finish.
  • Drill: For creating holes for handles, feet, or other hardware.
  • Screwdriver: For assembling the tray components.
  • Glue: For bonding wood or acrylic pieces.
  • Paintbrushes and Rollers: For applying paint or stain.

Marketing and Pricing Strategies

To achieve success at craft markets, effective marketing and pricing strategies are essential. Consider these key aspects:

Marketing

  • Eye-catching Display: Showcase your bath trays in a visually appealing and organized manner at your craft market stall.
  • Product Signage: Include clear and concise signage that highlights key features, benefits, and pricing information.
  • Product Demonstrations: Demonstrate the functionality and appeal of your bath trays to potential customers.
  • Social Media Marketing: Promote your creations on social media platforms, sharing high-quality images and videos of your bath tray designs.
  • Networking and Collaboration: Connect with other craft market vendors and potential customers to build a strong network and generate referrals.

Pricing

Pricing your bath trays strategically is crucial for profitability. Consider these factors:

  • Material Costs: Account for the cost of materials, including wood, acrylic, hardware, paint, and any decorative elements.
  • Time Investment: Factor in the time spent crafting each bath tray, including design, construction, and finishing.
  • Market Demand and Competition: Research prices of similar bath trays sold at other craft markets and online to ensure competitive pricing.
  • Profit Margin: Aim for a reasonable profit margin that covers your expenses and allows for business growth.

Tips for Enhancing Profitability

To maximize your profitability in the craft market, implement these additional tips:

  • Offer Bundles and Sets: Create bundles of bath trays with coordinating accessories like bath bombs, candles, or soaps to increase average order value.
  • Introduce Seasonal and Holiday Designs: Tailor your bath tray designs to seasonal themes and holidays to capture peak demand.
  • Expand Product Lines: Consider creating related products like bath mats, bath organizers, or towel racks to offer a more comprehensive selection.
  • Provide Excellent Customer Service: Go the extra mile with friendly and helpful customer service to build brand loyalty and encourage repeat business.

By implementing these strategies and refining your craft, you can transform your passion for bath tray creation into a thriving craft market business. Remember, consistency, creativity, and a genuine desire to delight customers are the cornerstones of craft market success.

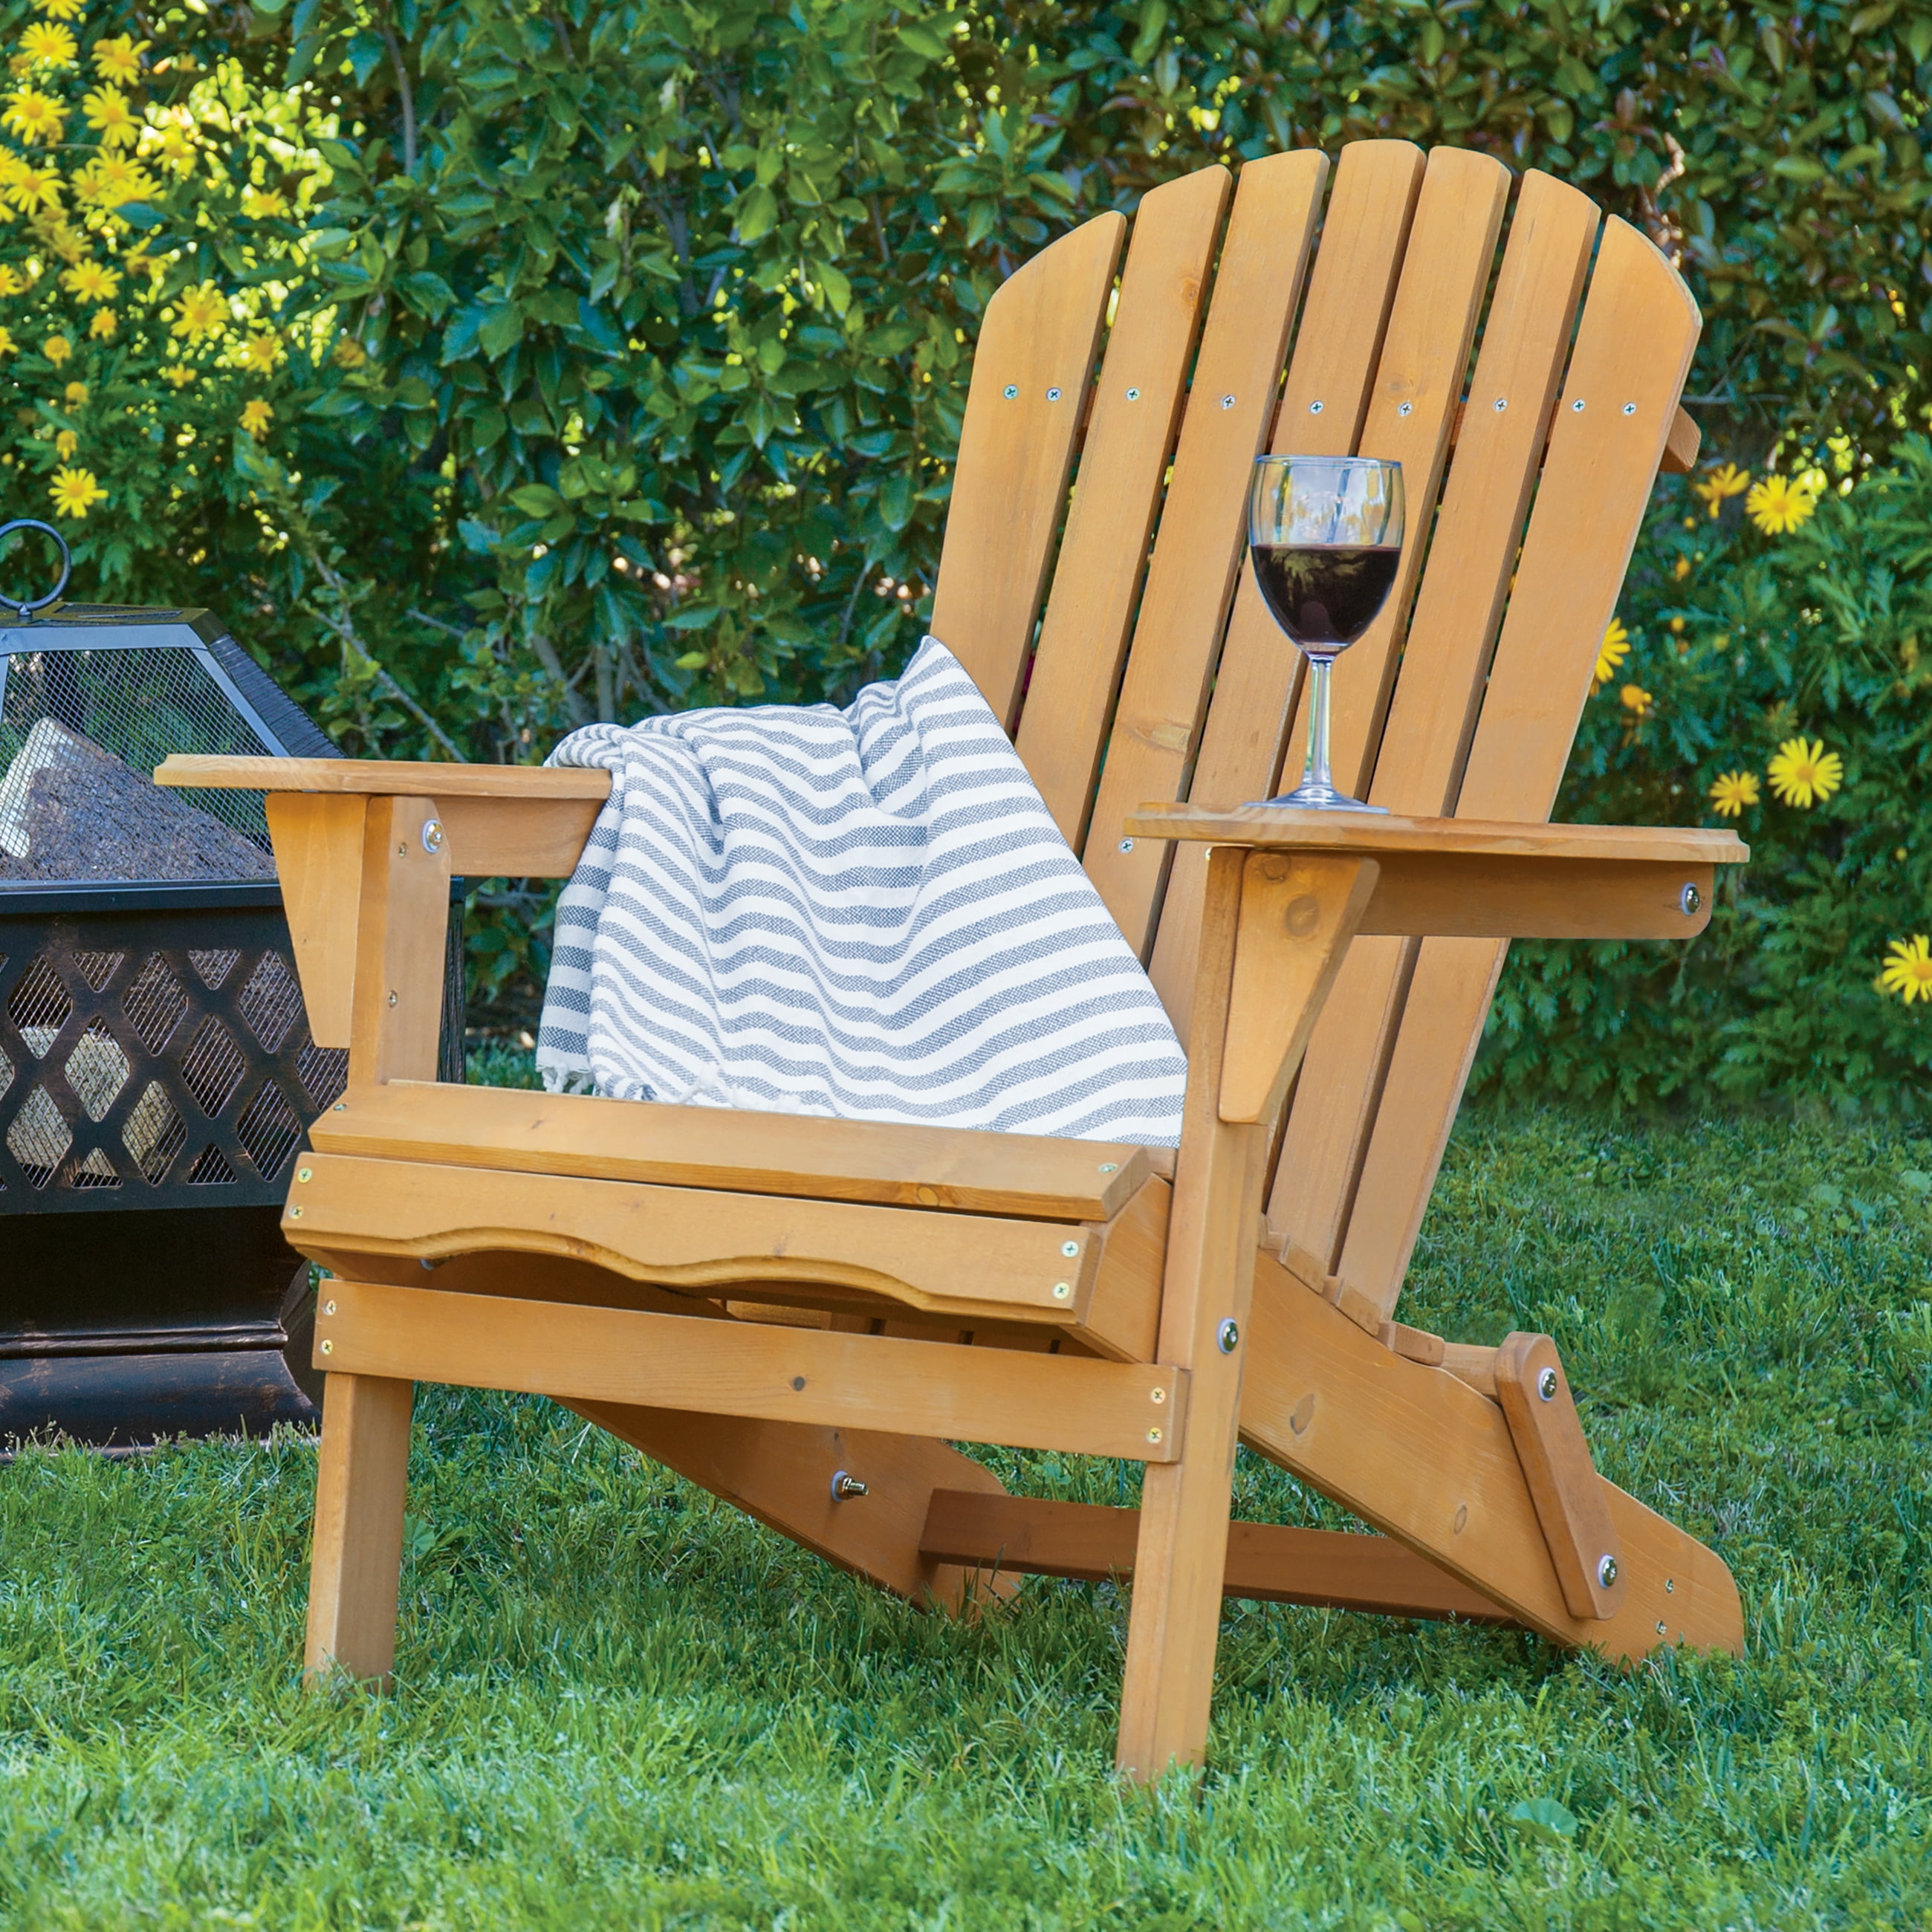
Wooden Lawn Chairs That Will Appeal to Garden Enthusiasts and Homeowners

Wooden Lawn Chairs That Will Appeal to Garden Enthusiasts and Homeowners

Wooden Lawn Chairs: Perfect for Garden Enthusiasts and Homeowners

There's nothing quite like relaxing in a comfortable chair with a good book and the gentle sounds of nature. And what better place to do that than in your own garden? Wooden lawn chairs are a classic choice for outdoor seating, offering a natural, timeless look that complements any garden aesthetic. But with so many options available, how do you choose the perfect chairs for your needs?

Benefits of Wooden Lawn Chairs

Wooden lawn chairs offer a multitude of benefits that make them a popular choice for homeowners and garden enthusiasts:

Durability and Longevity

Quality wooden lawn chairs are built to last. Made from sturdy hardwoods like teak, cedar, or oak, they can withstand the elements and provide years of enjoyment. Unlike their plastic counterparts, wooden chairs don't fade or crack in the sun, and they can even be passed down through generations.

Natural Beauty and Charm

The natural grain and warm tones of wood add a touch of elegance and rustic charm to any outdoor space. Wooden chairs blend seamlessly with the surrounding greenery, creating a peaceful and inviting atmosphere.

Comfort and Support

While some may think wooden chairs are uncomfortable, the truth is that well-crafted wooden chairs can be surprisingly comfortable. Their sturdy construction and contoured designs offer excellent support for your back, making them ideal for long periods of relaxation.

Versatility and Style

Wooden lawn chairs come in a variety of styles, from classic Adirondack chairs to modern, minimalist designs. You can find chairs with or without arms, with or without backs, and in a range of finishes to match your existing furniture and decor.

Choosing the Right Wooden Lawn Chairs

When choosing wooden lawn chairs, consider the following factors:

Wood Type

The wood type affects the durability, appearance, and price of the chairs:

  • Teak: Known for its exceptional durability, natural oil content, and resistance to weathering. Teak chairs are the most expensive option, but they offer the longest lifespan.
  • Cedar: Highly resistant to rot and insects, cedar offers a natural, aromatic scent. Cedar chairs are a good middle ground in terms of price and durability.
  • Oak: Known for its strength and beautiful grain patterns, oak chairs are a classic choice that can withstand heavy use. However, they may require more maintenance than other woods.
  • Other hardwoods: Other woods like mahogany, walnut, and cherry can also be used to make lawn chairs, each offering unique characteristics and aesthetics.

Style and Design

Consider the overall style of your garden and home when choosing chair designs. Do you prefer a rustic, traditional look, or a more modern, minimalist aesthetic?

  • Adirondack chairs: Known for their iconic design with high backs, armrests, and a slightly reclined seat. They are perfect for relaxing and enjoying the scenery.
  • Folding chairs: Convenient and space-saving, folding chairs are easy to store when not in use. They come in various styles and can be made from different wood types.
  • Modern chairs: Sleek and minimalist designs with clean lines and contemporary finishes. These chairs can add a touch of sophistication to your outdoor space.

Comfort and Ergonomics

Consider the size and shape of the chairs to ensure they are comfortable for everyone who will use them. Look for chairs with wide seats and comfortable backrests.

Maintenance and Care

All wooden chairs require some maintenance to keep them looking their best. Some woods are more resistant to weathering than others, and some finishes require less upkeep. Consider how much time and effort you are willing to invest in maintenance.

Tips for Caring for Your Wooden Lawn Chairs

To keep your wooden lawn chairs looking their best and lasting longer, follow these simple tips:

  • Clean regularly: Use a mild soap and water solution to clean the chairs. Avoid harsh chemicals or abrasive cleaners that can damage the wood.
  • Apply a sealant: Apply a water-based sealant to protect the wood from moisture and UV rays. This will help prevent warping, cracking, and fading.
  • Store properly: During the winter months, store your chairs in a dry, covered area. This will help protect them from the elements.
  • Repair minor damage: If you notice any minor scratches or dents, repair them promptly to prevent further damage. You can use wood filler or a wood stain to touch up the affected areas.

Wooden Lawn Chairs: An Investment in Outdoor Comfort and Style

Wooden lawn chairs are a timeless investment that will enhance your outdoor living experience for years to come. By choosing the right chairs and taking care of them properly, you can enjoy their natural beauty, durability, and comfort for generations to come.

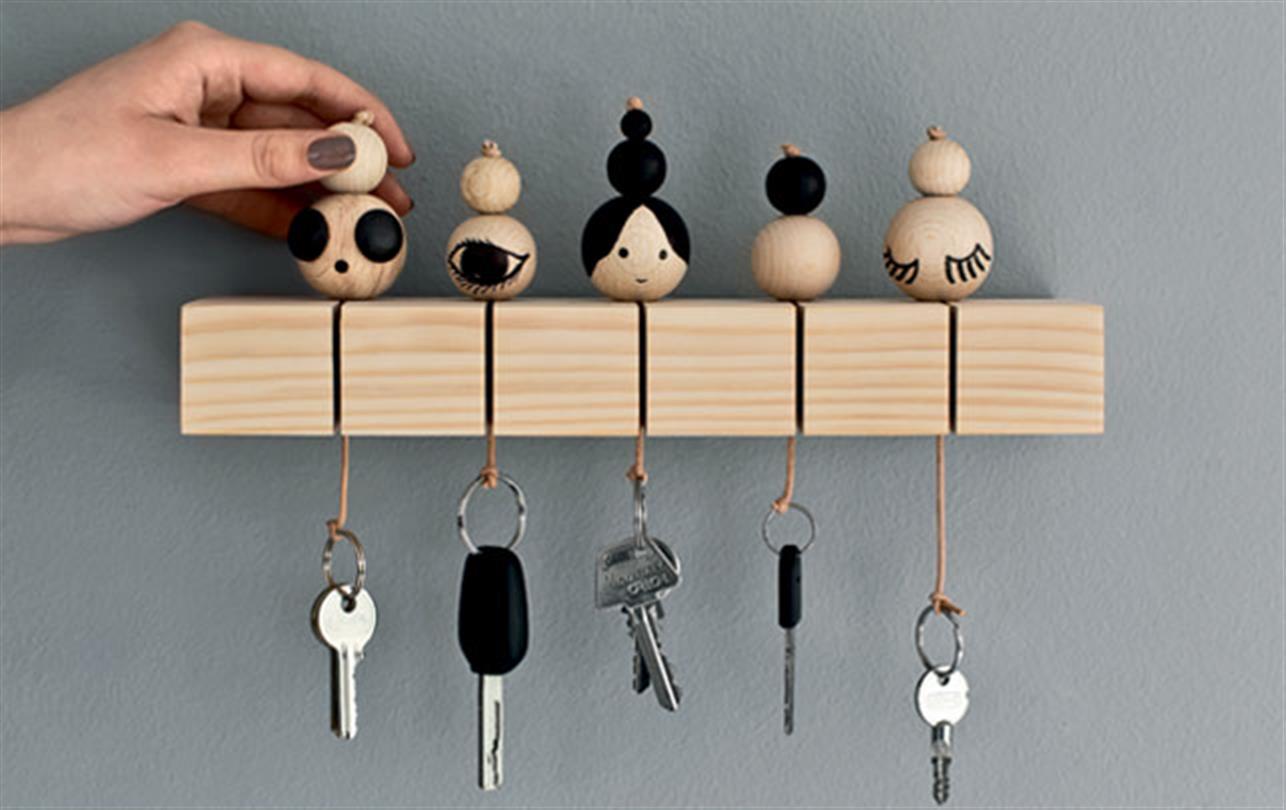
Key Holder Projects That Will Add Style and Function to Any Home

Key Holder Projects That Will Add Style and Function to Any Home

Key Holder Projects That Will Add Style and Function to Any Home

Let’s face it: keys are a necessary evil. We need them to get into our homes, cars, and even sometimes to unlock our mailboxes! But with all this importance comes a lot of potential for chaos â€" keys getting lost, scattered all over the place, or worse, forgotten altogether.

That’s where a key holder comes in. Not only do they help you keep track of your keys, but they can also add a touch of style to your home.

Ready to tackle a fun and functional DIY project? Here are some key holder ideas that will add style and function to any home:

Upcycled Key Holders

Upcycling is a great way to give old items a new lease on life while reducing waste. Here are some ideas for turning everyday objects into creative key holders:

Vintage Suitcases

Got an old suitcase gathering dust in your attic? Give it a makeover and transform it into a stylish key holder.

Here’s what you’ll need:

  • An old suitcase
  • Paint (optional)
  • Sandpaper (optional)
  • Hooks or key rings
  • Hardware for mounting (screws, nails, etc.)

Just clean and sand the suitcase (optional), add a fresh coat of paint if you want, and attach your hooks or key rings to the inside. You can even personalize it by adding your name or initials! Hang it on your wall and you’re ready to go!

Old Wooden Ladders

Old wooden ladders can be repurposed into a rustic and charming key holder.

Here’s what you’ll need:

  • A small wooden ladder
  • Sandpaper
  • Paint or stain (optional)
  • Hooks or key rings
  • Hardware for mounting

Lightly sand the ladder and apply a coat of paint or stain (optional). Attach hooks or key rings to the rungs of the ladder, making sure they are secure. Mount the ladder on your wall and enjoy your new rustic key holder.

Cork Boards

Cork boards are a fantastic choice because they are affordable and easy to customize. You can find them at most craft stores.

Here’s what you’ll need:

  • A cork board
  • Hooks or key rings
  • Pushpins or tacks
  • Decorative paper or fabric (optional)

Simply attach hooks or key rings to the cork board with pushpins or tacks. You can even get creative and cover the cork board with decorative paper or fabric. You can also use the cork board to hold other important items, like mail or notes, all in one place!

Creative Key Holder Ideas

If you want to think outside the box, these ideas are for you:

Key Holder With A Touch of Nature

Embrace the outdoors with a unique key holder. Use a small branch, driftwood, or a piece of reclaimed wood. Attach hooks or key rings to the wood and you have a beautiful, one-of-a-kind key holder.

Statement Piece Key Holder

If you’re looking to make a statement, use a vintage mirror or framed artwork. Attach hooks or key rings to the bottom or sides of the piece. This will not only hold your keys but also add a touch of personality and style to your entryway.

Animal-Shaped Key Holders

Get crafty and create fun animal-shaped key holders. You can use wood, metal, or even clay to create your own unique key holders.

This project is great for families with children. It’s a fun and engaging way to teach your kids about woodworking, metalworking, or clay sculpting.

Key Holder Designs for Every Style

No matter your style, you’ll find the perfect key holder design to match.

Rustic Key Holders

Embrace the natural beauty of wood with a rustic key holder. They often feature reclaimed wood, distressed finishes, and simple designs. They’re perfect for a farmhouse or cabin-inspired decor.

Modern Key Holders

For a modern home, a key holder with clean lines and minimal embellishments is the way to go. Look for key holders made from materials like metal, glass, or acrylic. They often feature geometric shapes and bold colors.

Industrial Key Holders

Industrial key holders are characterized by their use of exposed metal and reclaimed materials. Think pipes, gears, and other industrial components. These pieces are perfect for creating a masculine or edgy feel in your home.

Bohemian Key Holders

Bohemian key holders are known for their eclectic mix of patterns, textures, and colors. Look for key holders that incorporate elements like macrame, beads, or colorful fabrics. They are perfect for adding a touch of whimsy and bohemian charm to your home.

Additional Tips for Making Your Key Holder

Here are a few tips to help make your key holder project a success:

  • Measure twice, cut once. Make sure you have the right dimensions before you start cutting or drilling.
  • Use the right tools. The right tools can make the difference between a successful project and a frustrating one.
  • Safety first. Always wear safety glasses and gloves when working with power tools or sharp objects.
  • Take your time. A well-crafted key holder will last for years. Take your time and don’t rush the process.
  • Have fun. The most important thing is to have fun and let your creativity shine. Enjoy the process!

A key holder is more than just a place to hang your keys. It’s a chance to add a touch of personality and style to your home. It’s a conversation starter, a reminder of your unique style, and a way to keep your keys organized and easy to find. So grab some materials, get creative, and start making your own key holder today! You won't regret it!

Wednesday, November 13, 2024

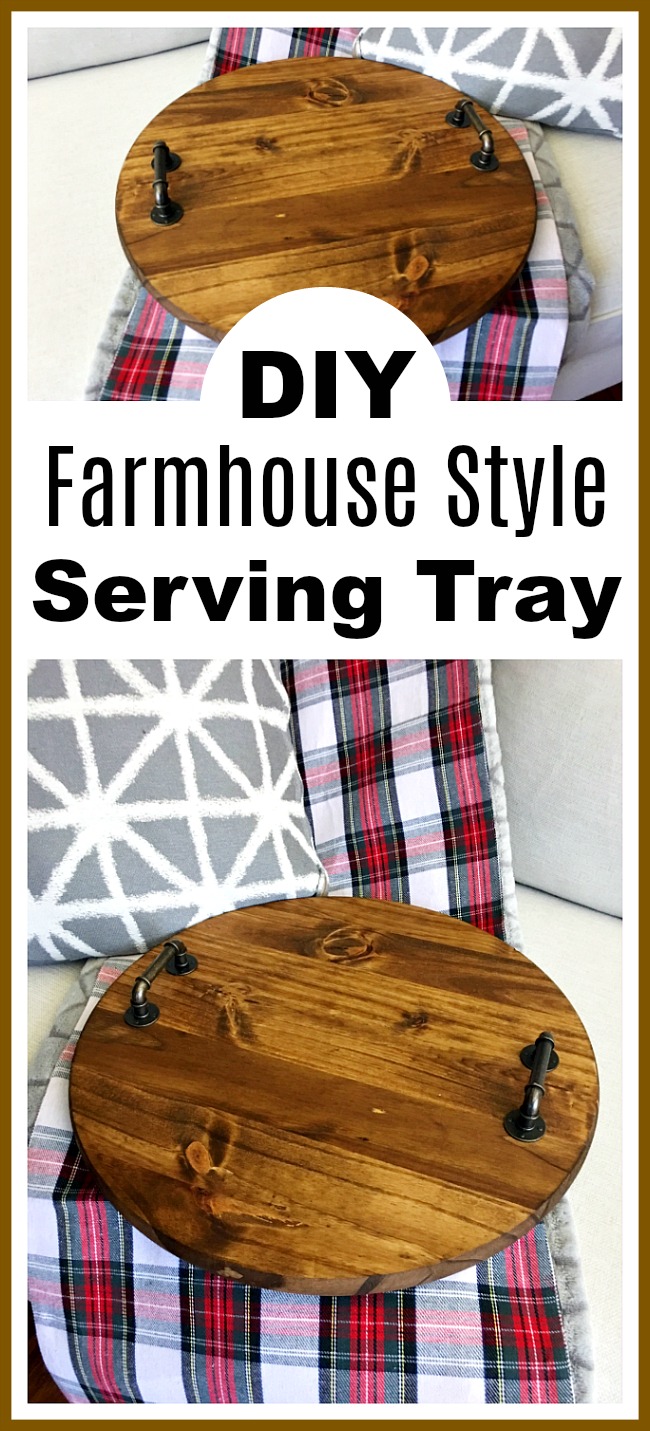
How to Create Farmhouse-Style Wooden Serving Trays for Profit

How to Create Farmhouse-Style Wooden Serving Trays for Profit

Creating Farmhouse-Style Wooden Serving Trays for Profit

In the realm of home decor, farmhouse style has emerged as a dominant trend, captivating hearts with its rustic charm and timeless elegance. Among the coveted pieces in this aesthetic are wooden serving trays, adding warmth and practicality to kitchens, dining tables, and even bathrooms. Capitalizing on this demand, you can embark on a profitable venture by crafting and selling farmhouse-style wooden serving trays. This article delves into the essentials of this endeavor, equipping you with the knowledge and tools to turn your passion for woodworking into a flourishing business.

Identifying Your Target Market and Niche

Before plunging into the intricacies of crafting, it's crucial to define your target market and carve out a niche within the farmhouse aesthetic.

Defining Your Target Audience

  • Homeowners: These individuals seek to enhance the ambiance of their homes, often drawn to the rustic charm of farmhouse décor.
  • Gift-givers: Farmhouse-style serving trays make thoughtful presents for housewarmings, birthdays, or special occasions.
  • Interior designers: Professionals in this field may incorporate your trays into their design projects, seeking unique and high-quality pieces.
  • Online shoppers: The internet offers a vast marketplace, connecting you with a global audience eager for farmhouse-style home décor.

Identifying Your Niche

  • Specialty Wood: Explore using reclaimed wood, salvaged barnwood, or exotic hardwoods to create a unique and premium offering.
  • Personalized Trays: Offer custom engravings, hand-painted designs, or personalized messages, catering to individual preferences.
  • Functional Focus: Specialize in trays designed for specific purposes, such as serving cheese, breakfast, or beverages, or cater to specific seasons or holidays.
  • Size and Shape: Experiment with different sizes, shapes, and styles, providing diverse options to your customers.

Crafting Your Farmhouse-Style Wooden Serving Trays

Now that you've established your target market and niche, it's time to roll up your sleeves and bring your farmhouse-style serving tray vision to life. The process involves a combination of meticulous planning, expert craftsmanship, and attention to detail.

Materials and Tools

Gather the necessary materials and tools to ensure a smooth and successful crafting process:

  • Wood: Choose high-quality wood that aligns with your desired aesthetic, such as pine, oak, or reclaimed wood.
  • Wood Glue: Use a strong and durable wood glue to securely bond the pieces of the tray.
  • Wood Stain or Paint: Select a stain or paint color that complements the farmhouse style, such as natural wood tones, whitewash, or muted shades of gray.
  • Polyurethane: Apply a layer of polyurethane to protect the wood from moisture and scratches, ensuring a durable finish.
  • Saw: A table saw, circular saw, or jigsaw is necessary for cutting the wood to your desired dimensions.
  • Sandpaper: Use sandpaper to smooth the wood surfaces and prepare them for staining or painting.
  • Clamps: Securely clamp the pieces of the tray together while the glue dries.
  • Measuring Tape and Ruler: Precise measurements are essential for creating a professional-looking tray.
  • Optional: Depending on your design, you may also need hardware for handles, decorative metal accents, or stenciling tools.

Crafting Steps

Once you've assembled your materials and tools, follow these steps to create your farmhouse-style wooden serving trays:

  1. Design and Sketch: Sketch out your desired tray design, determining the dimensions, shape, and any decorative elements.
  2. Cut the Wood: Using your chosen saw, cut the wood to your specified measurements. Ensure precise cuts for a seamless and aesthetically pleasing finish.
  3. Assemble the Tray: Apply wood glue to the edges of the pieces and carefully clamp them together, ensuring a secure bond.
  4. Sanding: Once the glue has dried, use sandpaper to smooth out any rough edges and create a uniform surface.
  5. Staining or Painting: Apply your chosen stain or paint, following the manufacturer's instructions. Allow adequate drying time before proceeding.
  6. Finishing Touches: Add any decorative elements such as handles, metal accents, or stencils.
  7. Polyurethane Coating: Apply a layer of polyurethane for a protective finish.
  8. Quality Check: Inspect the finished tray for any flaws or imperfections.

Marketing and Sales Strategies

With your farmhouse-style wooden serving trays ready for the world, it's time to develop effective marketing and sales strategies to reach your target audience and turn your passion into a profitable business.

Online Marketplaces

  • Etsy: Etsy is a popular online marketplace for handmade and vintage goods, perfect for showcasing your unique farmhouse-style trays.
  • Amazon Handmade: Amazon offers a platform specifically for handmade items, expanding your reach to a wider audience.
  • Your Own Website: Create a professional website with high-quality photos and detailed descriptions of your trays, allowing for direct sales and customer engagement.
  • Social Media: Utilize social media platforms like Instagram, Facebook, and Pinterest to showcase your work, engage with potential customers, and run targeted advertising campaigns.

Offline Sales Channels

  • Local Craft Fairs and Markets: Participate in local craft fairs and markets, allowing direct customer interaction and showcasing your handcrafted trays.
  • Consignment Shops: Approach consignment shops specializing in home décor and farmhouse style to sell your trays on their shelves.
  • Gift Shops and Boutiques: Partner with local gift shops and boutiques to reach a wider audience and gain valuable retail exposure.

Pricing and Profitability

Pricing your trays strategically is crucial to ensure profitability and a competitive edge.

  • Cost Analysis: Calculate the cost of materials, labor, packaging, and marketing.
  • Competitive Research: Research prices of similar trays on online marketplaces and in local stores to establish a benchmark.
  • Profit Margin: Set a profit margin that covers your costs and ensures a sustainable business.
  • Value Proposition: Highlight the unique selling points of your trays, such as high-quality materials, craftsmanship, and personalization, to justify your pricing.

Conclusion

Creating and selling farmhouse-style wooden serving trays can be a rewarding and profitable venture. By meticulously crafting your products, implementing effective marketing strategies, and pricing your trays strategically, you can establish a flourishing business that captures the essence of rustic charm and elevates the everyday with the warmth of handmade artistry.

Simple DIY Wooden Candle Holders You Can Make in a Weekend

Simple DIY Wooden Candle Holders You Can Make in a Weekend

Simple DIY Wooden Candle Holders You Can Make in a Weekend

Add a touch of warmth and rustic charm to your home with these easy-to-make wooden candle holders. These DIY projects are perfect for beginners, requiring only basic tools and materials. You can personalize them to match your décor, making them a unique and thoughtful gift.

Gather Your Supplies

Before you get started, make sure you have everything you need. Head to your local hardware store or craft supply shop to grab the following:

Materials

  • Wooden blocks or rounds (various sizes and shapes)
  • Sandpaper (various grits)
  • Wood stain or paint (optional)
  • Clear sealant (optional)
  • Drill with a drill bit slightly smaller than the diameter of your candle
  • Candles of your choice

Tools

  • Measuring tape
  • Pencil
  • Safety goggles
  • Gloves (optional)

Step-by-Step Guide

Follow these simple steps to create your own unique candle holders:

1. Prepare the Wood

Start by sanding your wooden blocks or rounds with sandpaper to smooth out any rough edges and create a consistent surface. If desired, apply wood stain or paint to your chosen wood. Allow the stain or paint to dry completely before moving on.

2. Drill the Candle Hole

Use a drill bit slightly smaller than the diameter of your candle to create a hole in the center of the wooden block or round. Be careful not to drill all the way through the wood.

3. Finish the Candle Holder

Once the hole is drilled, use a fine-grit sandpaper to smooth out any rough edges around the hole. Apply a clear sealant if desired, ensuring it dries completely before placing candles.

4. Place Your Candle

Carefully insert your chosen candle into the hole. The candle should fit snugly, ensuring stability. Light your candle and enjoy the warm glow and rustic charm of your handmade candle holder.

Tips and Variations

Here are some tips to customize your candle holders and make them truly your own:

  • Use different shapes and sizes of wood: Experiment with different wood types, like reclaimed wood or driftwood, to create a unique look.
  • Add decorative elements: Consider adding decorative elements like carved patterns, painted designs, or even small metal accents.
  • Create a set: Make multiple candle holders in different sizes and shapes to create a beautiful display.
  • Experiment with finishes: Explore different wood stains, paints, and sealants to achieve the look you desire.

With a little creativity and effort, you can craft charming and personalized candle holders that will enhance the ambiance of your home. These simple DIY projects are a great way to add a touch of warmth and character to any space.

Thursday, November 5, 2020

18mm marine plywood Best savings

Any 18mm marine plywood can easily located in this article Hence you absolutely need 18mm marine plywood is really widely used in addition to most of us imagine numerous a long time to arrive These can be a tiny excerpt a key niche connected with 18mm marine plywood we hope you understand what i mean and also listed here are several images coming from different options

Photos 18mm marine plywood


Marine Plywood 18mm 8ft x 4ft (2440mm x 1220mm): Amazon.co

Marine Plywood 18mm 8ft x 4ft (2440mm x 1220mm): Amazon.co

WBP plywood sheet | Peppard Building Supplies

WBP plywood sheet | Peppard Building Supplies

Marine Plywood 8' x 4' x 12mm

Marine Plywood 8' x 4' x 12mm

Phenolic Film Faced Plywood - 18mm Plywood Sheets Trailer

Phenolic Film Faced Plywood - 18mm Plywood Sheets Trailer